Showing posts with label 3D Warehouse. Show all posts

Wednesday, March 28, 2012

Product Connect makes it easier to design with real products

Last April, our friends (and partners) at Igloo Studios released Product Connect for Google SketchUp to help designers document the product choices made in their SketchUp models. Today, I’m happy to report a new version of Product Connect is now available for download from the Igloo Studios website. This version makes it even easier to design with real products.

This video provides a nice overview of the new release:


The new version of Product Connect features thousands of product models and these three plugin-based tools:

Get Products

Use Get Products to browse nearly 300 collections of branded and generic products

Get Products is a new tool that makes it dead simple to add pre-existing product models from the Google 3D Warehouse. Like the Get Models tool in SketchUp currently, Get Products launches the Google 3D Warehouse but directs you to a collection with nearly 300 sub-collections of branded and generic product models. You can choose products from a Product Connect enabled catalog and you'll find that product information has already been added for you. Or, choose other Building Product models and add the information yourself.

Product Editor

Product Editor being used to specify a Delta faucet

With the new Product Editor tool, you can now create your own Product Connect enabled models. Just take any SketchUp component (including materials), launch Product Editor, and add any information you need such as product type, name and description. Product Editor can also be used to add or edit info in pre-existing Product Connect enabled models such as project specific notes or price.

Report Maker

Report Maker created product schedule, pasted into a LayOut presentation

When you’ve finished your design, and filled it with Product Connect enabled components, the new and improved Report Maker tool allows you to save organized product schedules in .csv format. With just a few clicks, product lists can be included in construction document sets, edited to create pricing estimates, and even used to place and manage orders.

If you have an existing collection of SketchUp components that you’d like to enable for Product Connect, Igloo Studios offers a service for upgrading existing components. Or if you don’t already have product models created, Igloo Studios can help you with that too. Contact them for more information

Thanks again to Igloo Studios for another great launch that will help SketchUp users everywhere streamline the product selection and specification process.

Posted by Gopal Shah, SketchUp marketing

Thursday, November 10, 2011

Announcing the 2012 Google Model Your Town Competition

Following the success of last year’s Google Model Your Town competition, today we're launching the second Google Model Your Town Competition. Model Your Town is about geo-modeling – making photo-textured models of real-life buildings that appear in Google Earth. The Model Your Town Competition is also a chance to celebrate your town by adding it to the 3D map. Of course, the USD$25,000 for a local school/district is a nice incentive too.

Barranco, Lima, Peru

The Model Your Town Competition is open to just about everyone, just about everywhere in the world. Form a team, model buildings (using SketchUp or Building Maker) and upload them by the end of February 2012.


You can model as many structures as you like – which types of buildings you choose to include is entirely up to you. The important thing is that your choices say something about the character and history of your town.

If your town wins, a bunch of us from the SketchUp team will visit, throw you a dinner party and do our best to make you feel like the local hero that you truly are. Check out the competition website for details, and start rounding up teammates!

Here's some inspiration by way of the 2010 winner, Jorge De Albertis, from Lima, Peru (just to get your creative juices flowing):


New to geo-modeling? Learn more at Your World in 3D, then get started modeling your town!

Posted by Allyson McDuffie, Google Geo team

Friday, October 7, 2011

Announcing the SketchUp Halloween Challenge

With Halloween just a few weeks away, nerds here in the Google Boulder office are in a tizzy about their costumes. We take this particular holiday very seriously.

A haunted house I modeled years ago, with two pumpkins by IDW. He modeled them for SketchUp Island's Pumpkin Patch collection on the 3D Warehouse.

This year, we thought it might be fun to host a SketchUp Halloween Challenge for folks who are looking for something to do in their spare time. The nitty gritty:

Categories

There are two: Use SketchUp to model either a jack-o’-lantern or a haunted house. Or both.

How to submit an entry

  1. Upload your model to the 3D Warehouse and make sure it’s publicly-downloadable.
  2. Upload between two and ten images of your model to a public photo sharing site like Picasaweb. You can use any photo sharing site you like, but make sure your images are grouped into an album by themselves. Images should be at least 1000 pixels wide or tall, depending on their orientation.
  3. Fill out the Challenge Submission Form, including links to both your model on the 3D Warehouse and your album of online images.

Judging

On Friday, October 28th, a group of us from the SketchUp team will get together to review the entries. We’ll be looking mostly at the images you submit; models will be examined when we’re picking the top three entries in each category. For an idea of what we’ll be looking for, consider these points:

  • Displays of SketchUp expertise are always impressive.
  • Anything that makes us say (out loud) “How’d he/she DO that?!!” is worth extra points.
  • We don’t want to see anything you wouldn’t show your grandma or your kids.
  • Beverages will almost certainly be involved in the judging process.

Multiple Entries

Submit as many models as you like, but fill out a separate entry form for each one. The more the ghastlier!


Rendering Rules

You can (if you like) include photo-rendered images of your model with the images you submit. You have to have at least one unrendered image, though; we’d like to see your work in its purest, SketchUp-only state.


Deadline

The deadline for submissions is 11:59 PM PST on Thursday, October 27th 2011.


Prizes

For fun little modeling challenges like this one, we prefer to keep things simple. Instead of prizes, we’ll publish our favorite entries right here on this blog, on October 31st. The best three models from each of the two categories (pumpkins and houses) will be featured in the November edition of the SketchUpdate newsletter, which goes to millions of people around the world.


Why no fancier prizes? When companies host big, international competitions, it takes months for their lawyers to figure everything out. On top of that, people from certain places (like Quebec and Brazil) end up being excluded because of specific laws that apply only to them. Ugh.


Other Stuff

If you’d like a blank pumpkin to start with, this collection contains a few. Other questions about the Challenge? Please ask ‘em in the Comments for this post. Good luck!

Sunday, August 7, 2011

Assigning materials to groups and components

Everybody knows that faces in SketchUp can be painted with different materials. What lots of folks don’t know is that you can apply materials to groups and components, too. The following illustration shows the Entity Info dialog box, which is a great place to see which materials are applied to your geometry.

The Entity Info dialog box (Window > Entity Info) shows thumbnails for the materials assigned to selected entities. When you select a face, it shows thumbnails for the front and back sides of that face (top). Groups and components have material thumbnails, too (bottom).

When you paint a group or component red, only the faces inside it that are painted with the Default* material turn red. Faces that have already been painted with another material don’t change at all.

The above group (top) includes faces that are painted with different materials (bottom). Only the top face is assigned the Default material.

Applying a material to the entire group only changes the color of faces that are painted the Default material.

This trick also works with groups and components that are nested inside one another. When you apply a material to a top level group or component, all the Default-colored faces that are inside nested, Default-colored groups and components inherit that material automatically. The following diagram is my best attempt at a visual explanation of this phenomenon.

Applying a material to a group or component that in turn contains sub-groups and component instances can be a confusing experience. Just remember that the color you’re painting “trickles down” to Default-colored faces contained within Default-colored groups and components. It’s easier done than said : )

*SketchUp automatically applies the Default material to faces you create from scratch. You can also paint anything with the Default material at any time; just pick it in the Materials Browser (which looks completely different on PCs and Macs.)

The Windows and Mac versions of the Materials Browser. On the former, the Default material is included as a permanent thumbnail; on the latter, it’s the first material in the “Colors In Model” list.

As you can see, this technique is a godsend for building complicated objects that need to change color easily. In the case of the George Nelson Marshmallow Sofa in the images that follow, the cushions are individual component instances nested inside the main Sofa component. These are assigned the Default material.

I downloaded this George Nelson Marshmallow Sofa component from FormFonts.

The individual cushions are instances of the same component. Each instance is assigned the Default material.

The faces that make up the surface of each cushion are also painted with the Default material.

All of the metal and rubber frame pieces are also groups and components, but their faces are all assigned specific materials.

The faces in the non-cushion parts of the sofa are all assigned materials other than Default.

When you use the Paint Bucket to paint a color—in this case orange—on the main Marshmallow Sofa component, only the cushions take on that color. Everything not assigned the Default material stays exactly the way it is.

Painting the sofa component orange causes all Default-painted faces to turn that color. Non-Default-colored faces remain unchanged.

Thursday, June 2, 2011

Partyin' in 3D in Serbia

Supermodeler Zeljko Zdravkovic, known as zexland on the 3D Warehouse, recently hosted a modeling party in Belgrade, Serbia. A modeling party is a workshop/conference hybrid designed to bring people from around the community to learn about geo-modeling and make models of a specific area. Zeljko invited both experienced modelers and soon-to-be modelers from cities all around Serbia: Belgrade, Novi Sad, Niš, Arandjelovac, Pančevo, Paraćin, Zaječar, Obrenovac, Valjevo, Bačka Palanka, Kosovska Mitrovica, Ćuprija and Jagodina!

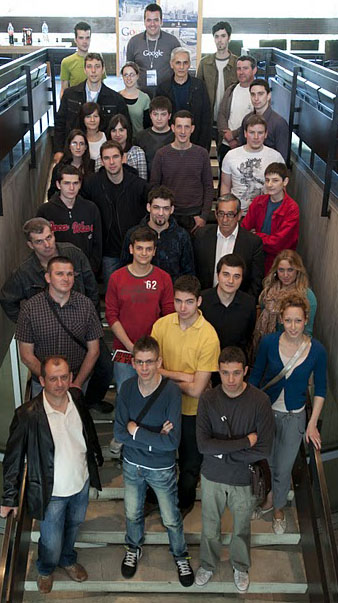
People from all around Serbia attended the event in Belgrade.

Two other talented modelers also made the trek from their respective homelands to share their modeling insights with the group, Bruno Redureau from France (3DCité) and Mano Papanikolaou from Greece (}-M@No->).

The first day of the event was spent covering the basics, but the real fun started on the second day when we took a tour of the city and specifically of Skadarlija, the bohemian district of Belgrade. Here you find many small shops and restaurants on the cobblestone streets are made up of watermelon-sized rocks. We took photos of the area to use later to create photo textures for future models.

Ironically, Bruno from France was the first to complete a model in Skadarlija! (“Restaurant Zlatni Bokal”)
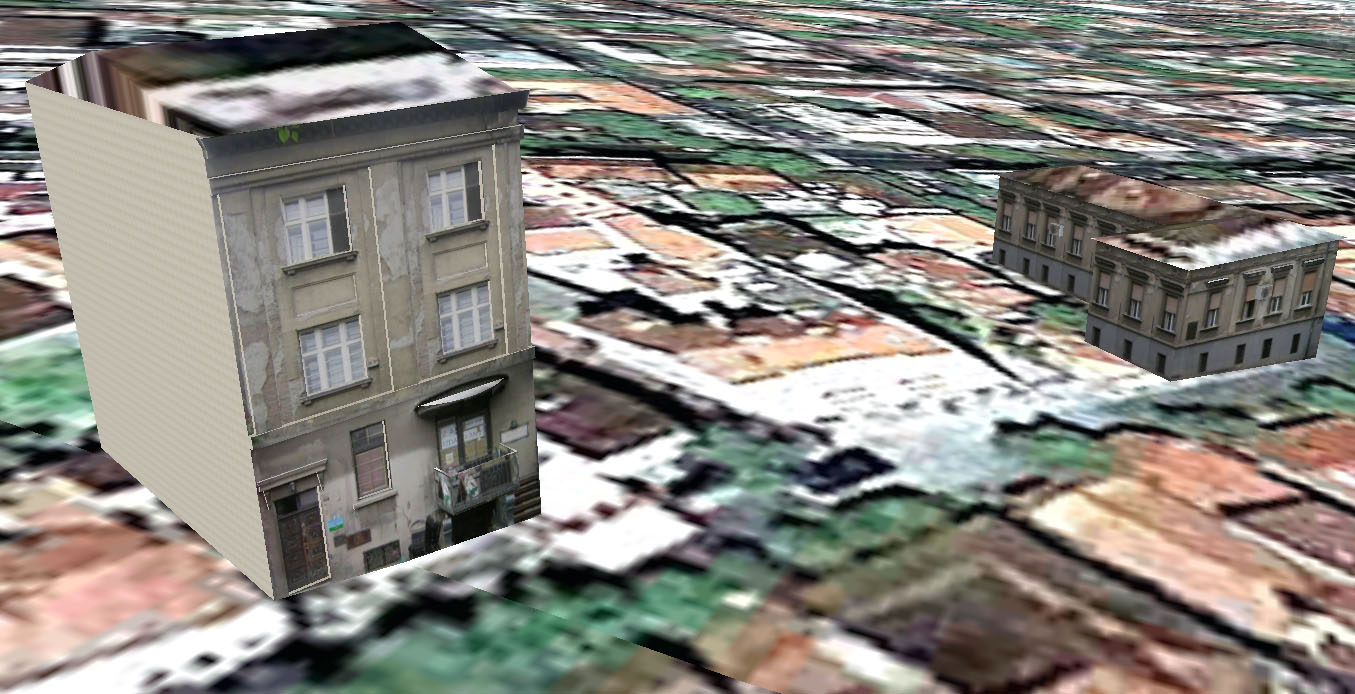
Stevan Suklovacki from Belgrade takes the lead, however, with two models already created!(“Stambeni objekat u Skadarskoj ulici” & “Zgrada u Skadarskoj ulici”)

In addition to learning modeling techniques and asking questions, the group shared stories with each other about their own geo-modeling projects, all the while sampling delicious Serbian finger-food. Fellow Serbians were able to meet one another in person, and put a face to a 3D Warehouse name.

Ready to model!

Srdjan Vidakovic, an avid Google Map Maker and Panoramio user, helped document the second day’s activities. View more photos of the event and watch Belgrade grow in 3D.

If you’re interested in having a modeling event in your town too, find out how! We’d love to help you get your town on the 3D map! Posted by Nicole Drobeck, Geo Community Program Manager

Thursday, April 7, 2011

Using SketchUp models in 3DVIA Scenes

Cliff Medling is my counterpart over at Dassault Systèmes; he’s the Evangelist for 3DVIA. Since we’re both in the business of spreading the word about the power and glory of 3D modeling (regardless of which tool you choose), we figured it would be productive to work together from time to time.

The first fruit of this collaboration is a video that Cliff made specifically for SketchUp modelers. It shows how to use 3DVIA Scenes to explore an imported SketchUp model by walking around inside it. The killer app (in my opinion) is a feature that lets multiple people explore the same model simultaneously as avatars. SketchUp’s Walk Tool offers a similar, first-person experience, but having the model online and accessible to anyone with a web connection is enormously powerful.


Two things: Cliff tells me that Mac compatibility for 3DVIA Scenes is on its way. Also, the clever folks over at Dassault have built an iOS app (for Apple mobile devices) that lets you view and interact with models you’ve uploaded to 3DVIA.com. Since COLLADA (.dae) is one of the formats they accept, you can use these apps to view SketchUp models, too. 3D everywhere!

Tuesday, February 15, 2011

Dutch geo-modelers gather to model The Hague

Cross-posted from the Dutch Google Product Blog.

Delft, The Netherlands was the most recent location for a Your World in 3D workshop. The goal of the event was to gather members of the local community to learn Building Maker so that they could model The Hague. Design8, an established Google SketchUp distributor in The Netherlands, organized, promoted and led a very successful event. Over 60 people attended the workshop, which was held at the ultra-modern technical facilities of TU Delft, a prominent Dutch engineering school.

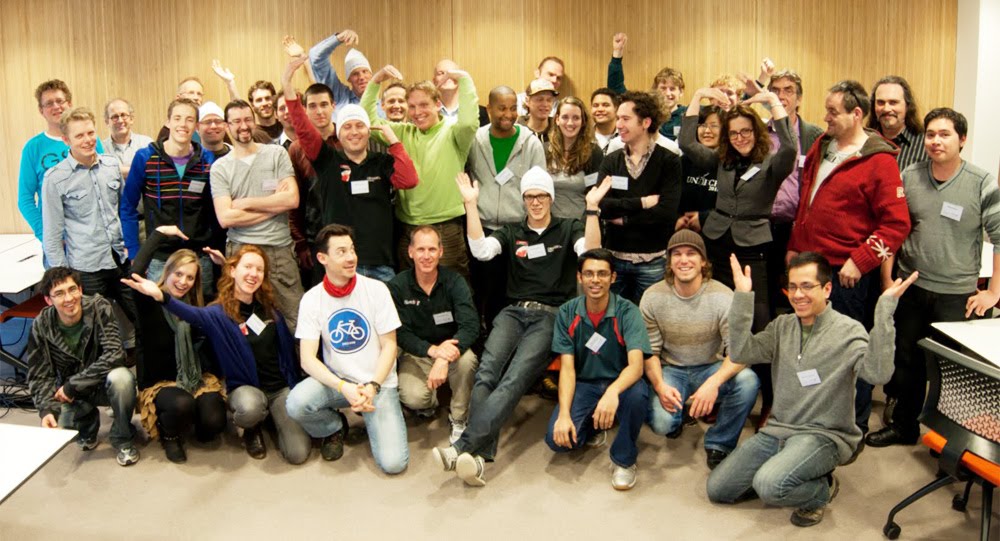
The Dutch version of YMCA?

The day was kicked-off with a presentation from Professor Alexander Verbraeck of TU Delft, where he shared numerous examples of how 3D digital models were being used today. “It’s no longer a fringe area of study” he said, “3D is very much here to stay.”

Participants listen to opening remarks.

I followed with a brief summary of why Google was supporting these workshops and why it was important for local residents to develop and maintain 3D models of their cities. To paraphrase: “The built-world is undergoing change every day. Local residents are in a far better position to maintain an accurate view of their town than Google.”

Workshop attendees ranged in both age and experience. We had everyone from teenagers who have grown up with computers in their lives, to retirees who are eager to learn a new skill. Building Maker is a tool that suits all ages and skill levels. The Hague was added to Building Maker in December with a few other cities. Geo-modeling has been popular in The Netherlands since the concept was first introduced in 2006, so the strong interest the workshop received wasn’t unexpected.

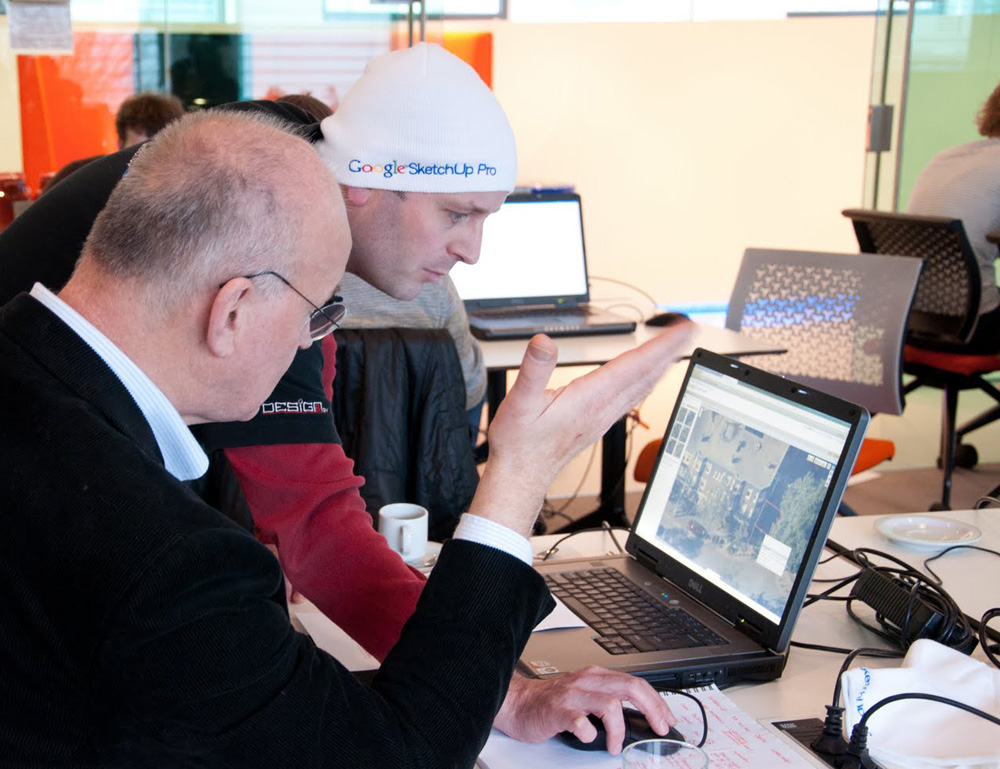
Orlando from Design8 assisting a workshop participant

After a short introductory demonstration by Orlando Sardaro of Design8, attendees began modeling. Prizes were offered for the best model and for the most models created. Had we offered a prize for "most distance traveled", Supermodeler MILO Minderbinder would have walked away with two awards. The young man, (who is not yet old enough to drive) endured a three-hour train ride (each way!) to attend the workshop. Not unexpectedly, MILO put his modeling talents to work and created this terrific model in SketchUp in the short time he was there. The prize for his work is a 3D print of the model, provided by i.materialise.


Nicole and I would like to thank Design8, TU Delft, and all the attendees for a terrific day!

Thursday, February 10, 2011

New in Building Maker: See what’s already modeled

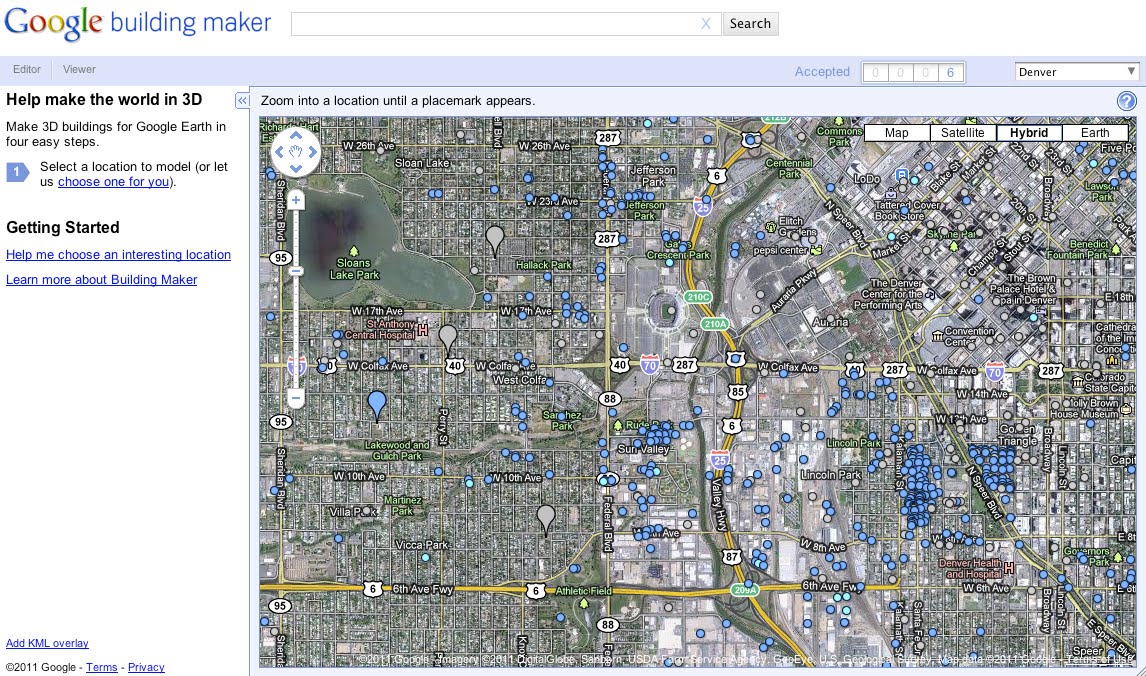
We’ve launched a slew of new features in Building Maker recently, but I thought I’d focus on one in particular for now. One of the trickiest things about Building Maker was figuring out which buildings had already been modeled and which hadn’t. I’m happy to announce that we’ve added a feature that solves this problem.

Colored markers in Building Maker indicate the "modeled status" of buildings on the map.

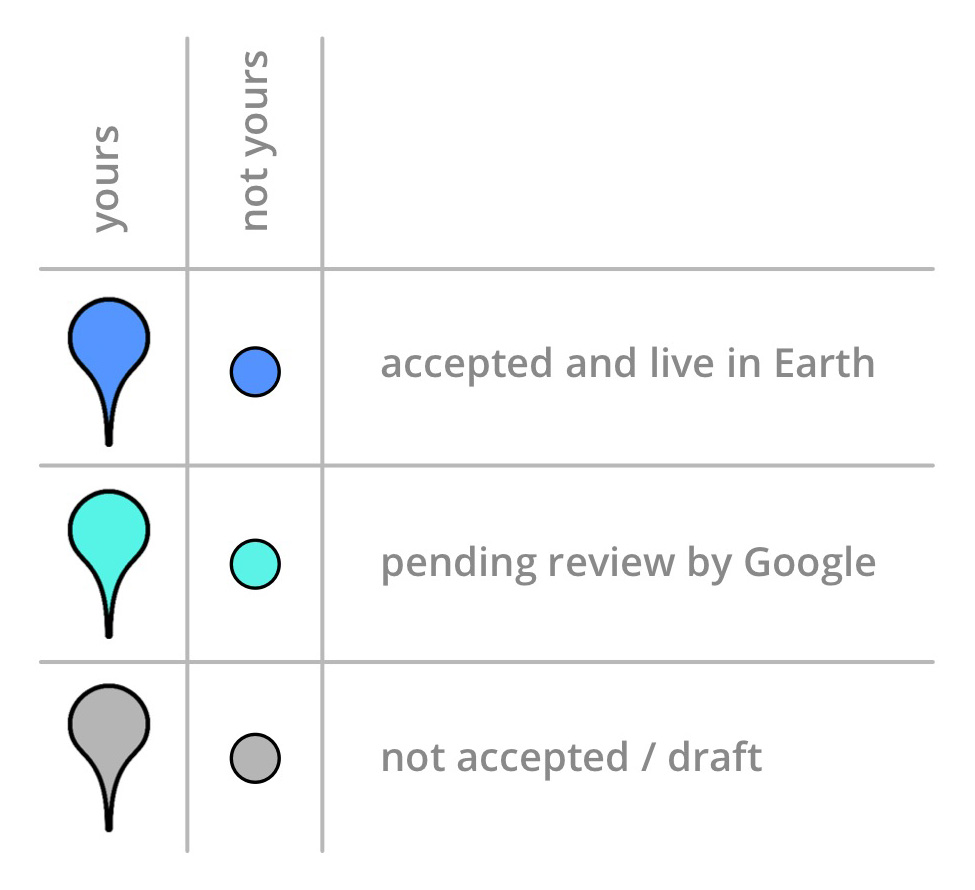
When you’re looking at a city in Building Maker, you’ll notice hundreds of colored blue and gray markers. These markers indicate the “modeled status” of the buildings on the map. Round dots show models by other people; placemarks show models you’ve made. Here’s what the colors mean:

  • Blue markers: Models which have been accepted and are live in Google Earth
  • Cyan markers: Models which are awaiting review by us
  • Gray markers: Models which have not been accepted

Feel free to tattoo this on your arm to help you remember what the symbols mean.

Buildings which haven’t been accepted (indicated by gray markers) fall into one of two categories. The first includes those which we’ve reviewed and decided not to include because they don’t meet the acceptance criteria for buildings in Google Earth. These gray markers also indicate geo-located models which are in draft (not marked “complete and ready for review”). If you’re geo-modeling a city with Building Maker, look for buildings with gray markers or no markers.

Fun fact: Internally, we refer to the little, round dots as “measles.” Since infectious diseases generally carry a negative connotation, we decided to call them “markers” instead. You’re free to call them anything you like.

Wednesday, November 17, 2010

New Japanese 3D cities available in Google Earth

Today, we’re happy to announce that three more Japanese cities are viewable in 3D in Google Earth: Yokohama, Sendai and Saitama.

Sun rising over Yokohama.

You can now tour photo-realistic, 3D buildings in these cities without leaving your house—or climbing aboard a shinkansen.


If you’d like to extend your virtual stay in Japan, you can take a tour of Tokyo, Kobe, Osaka or Kyoto, which are also available in Google Earth’s 3D Buildings layer.

We want to thank the many users who modeled and contributed 3D buildings for these Japanese cities. If you’re interested in creating buildings for your town—or for any town—we have several easy-to-use tools to get you started.

With Google Building Maker, you can create and contribute a building in as little as 10 minutes. In Japan, Building Maker is available for the following cities: Fukuoka, Hiroshima, Kobe, Kyoto, Nagoya, Osaka, Saitama, Sapporo, Sendai, Tokyo and Yokohama. And if you’d like to refine your building bring it into Google SketchUp for fine-tuning.

Happy modeling!

Posted by James Therrien, Google Geo Group

Thursday, November 11, 2010

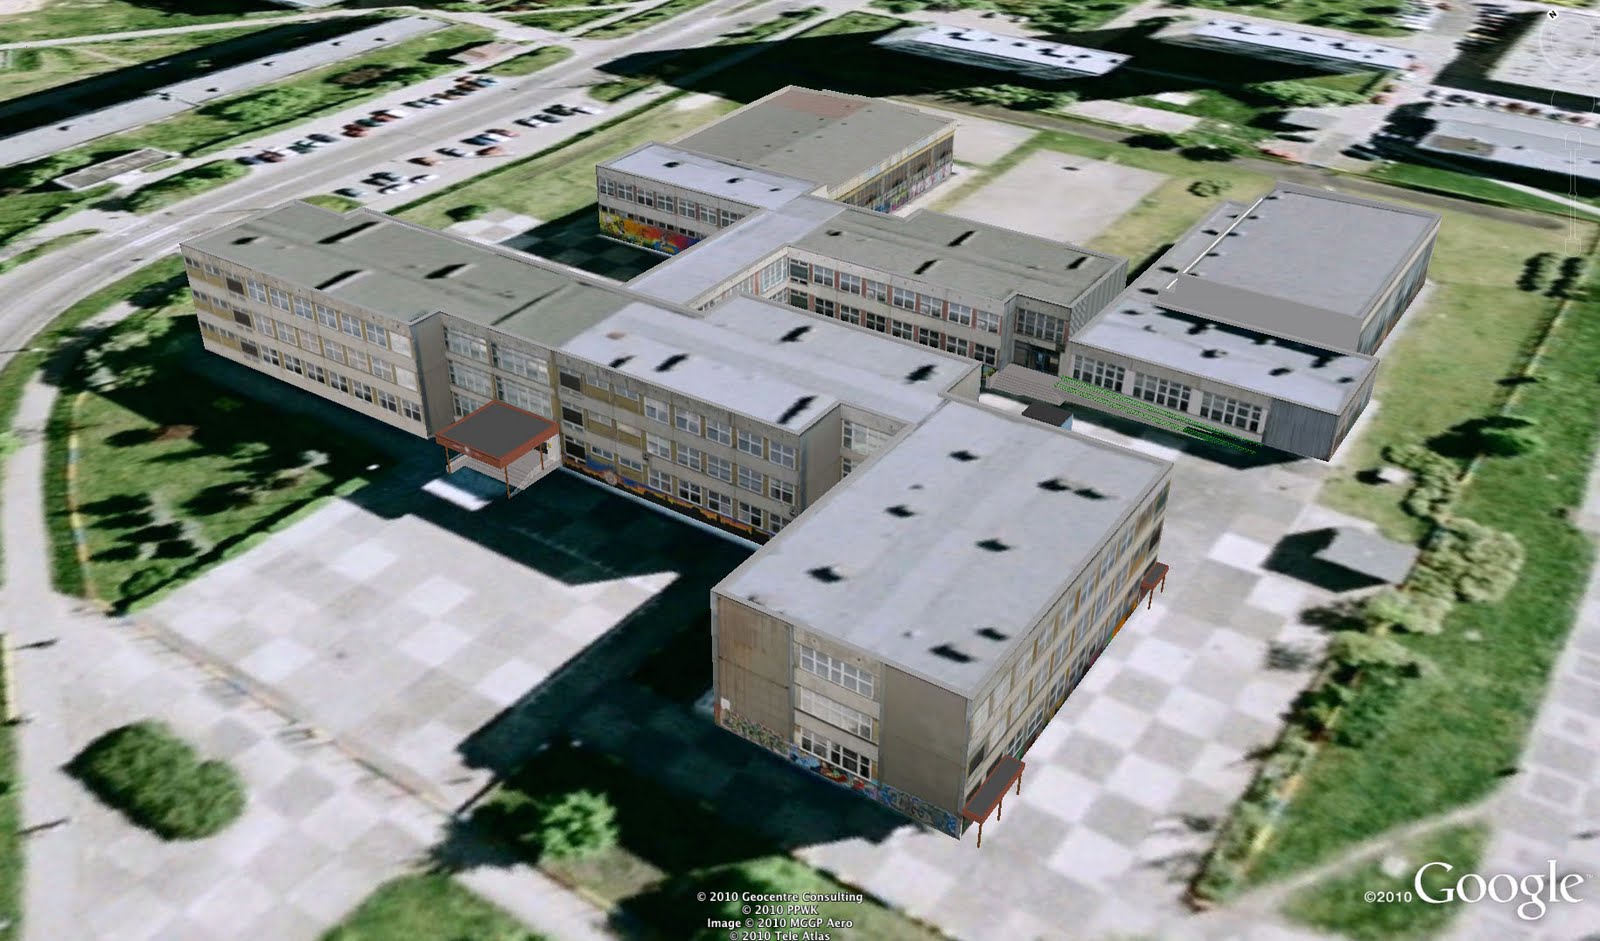
Summer Sketch Workshop in Toruń, Poland

This past summer, Supermodeler Arkadiusz Pawlowski (a.k.a. Arek, a.k.a. aroo) decided to hold a SketchUp workshop for students at the Nicolas Copernicus University of Toruń. He partnered with fellow Toruń alumni Radoslaw Golba to teach the course. I asked him a few questions about the experience:

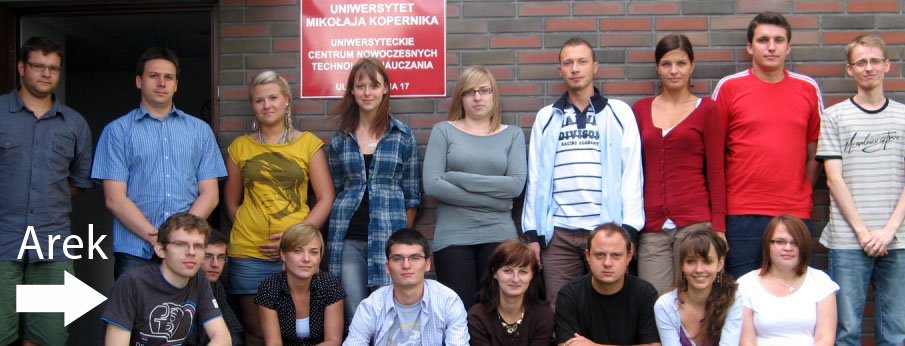
Arek alongside the workshop participants

Why did you decide to hold a workshop?

It was like an impulse I had on my way back from the 2010 Google Mapper and Modeler Summit held in Zurich. I came to the conclusion that it would be a good thing to organize classes for students to teach them what I knew about geo-modeling with SketchUp.

So the purpose of the workshop was to teach students how to geo-model?

Yes, but I also wanted to increase the students’ knowledge of modeling tools and have them practice visualizing objects in a digital 3D form. I encouraged them to work independently and to further develop the skills that they could use beyond geo-modeling.

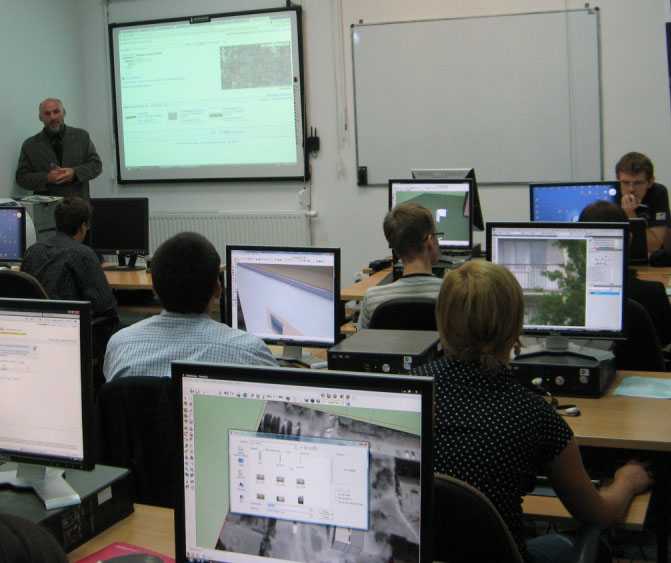
Workshop in session

What was the schedule like for the workshop?

Since most of the students had never used SketchUp before, the first day of the workshop was used to let them familiarize themselves with the program. On the second day, students went out to collect photographs of selected buildings, and then later edited the images to make textures for the model. The third day of the workshop was for actually modeling the buildings in SketchUp and then texturing them with the previous day’s photos. All of the complete models are in a collection on the 3D Warehouse.


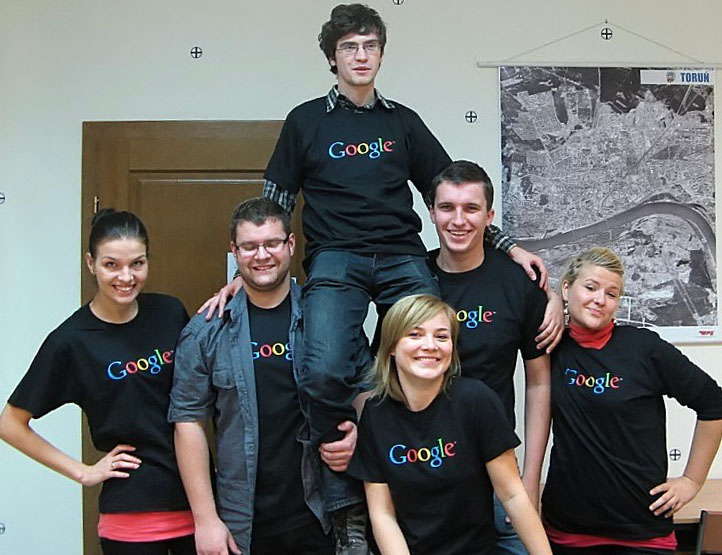
The workshop was also supported by the Department of Cartography, Remote Sensing and Geographical Information Systems of University of Toruń, who handed out certificates to participants at the end of the workshop... and Google provided t-shirts. :)

Workshop participants sporting awesome Google shirts

See more photos of Arek’s workshop, and download the placemarks of all the buildings created in the workshop, then view the models in Google Earth.

Wednesday, November 10, 2010

Who's the newest Super Modeler? Vote!

Today we’re announcing a new approach to bestowing “Super Modeler” status on our geo-modeling rock stars. More on that below—but first a little history.

A new form of 3D modeling began when @Last Software, the maker of SketchUp, was acquired by Google in 2006. Modeling 3D buildings for the purpose of viewing them in Google Earth went from being a quirky activity to a new art form. We refer to it as "geo-modeling.”

Being 3D enthusiasts ourselves, we were always on the lookout for good building models in the 3D Warehouse. When we discovered particularly impressive ones, we would add them to the featured modeler collection.


Church of the Savior on Spilled Blood by Arrigo Silva

Internally, we used the phrase “super modelers” to describe the people creating these amazing models, but it wasn’t until we started planning the first geo-modeling conference in August of last year that we began to publicly refer to modelers in this way. Following the event, a newsgroup was established, a collection created, and the user community representing some of the most skilled geo-modelers was officially born.

As the geo-modeling community expanded, so did the number of people creating remarkable models. We continued to add new modelers as we discovered them, and earlier this year we introduced badges in the 3D Warehouse—with one designated specifically for Super Modelers.

The coveted Super Modeler badge

With badges comes competition—more and more modelers began to ask how they could earn this honor. As time passed it became evident that we needed a clear set of criteria by which a modeler would be considered. The time had also come to establish greater transparency for how these decisions were being made, and who was making them.

So today we’re announcing a new process to become a Super Modeler—you decide!

It works like this: Each month the Super Modeler community will nominate ten geo-modelers who they believe are, well, super. Votes will be accepted for a three-week period. At the end of that period, the modeler who has received the most votes will become the newest Super Modeler.

In addition to being awarded a Super Modeler badge, the winner’s collection will be prominently featured on the Google 3D Warehouse until the next Super Modeler is selected. They'll also receive a one-of-a-kind “I’m a Google Supermodel(er)” t-shirt from the Google team.

It all starts now: Take a look at November's nominees, then cast your vote for the next Google Super Modeler!

Friday, October 15, 2010

Happy Birthday, Building Maker!

When we launched Google Building Maker on October 13th of last year, folks could build models in 50 cities on 3 continents, and Building Maker was available in 14 languages. During the past year, Building Maker’s coverage has grown to 101 cities on 6 continents, and it’s now available in 40 languages. Modelers can now also add their own photos and Street View textures, and even open their buildings in SketchUp to add finishing touches.

To celebrate this anniversary, we’re highlighting three of the individuals who have made incredible contributions to the worldwide 3D map:


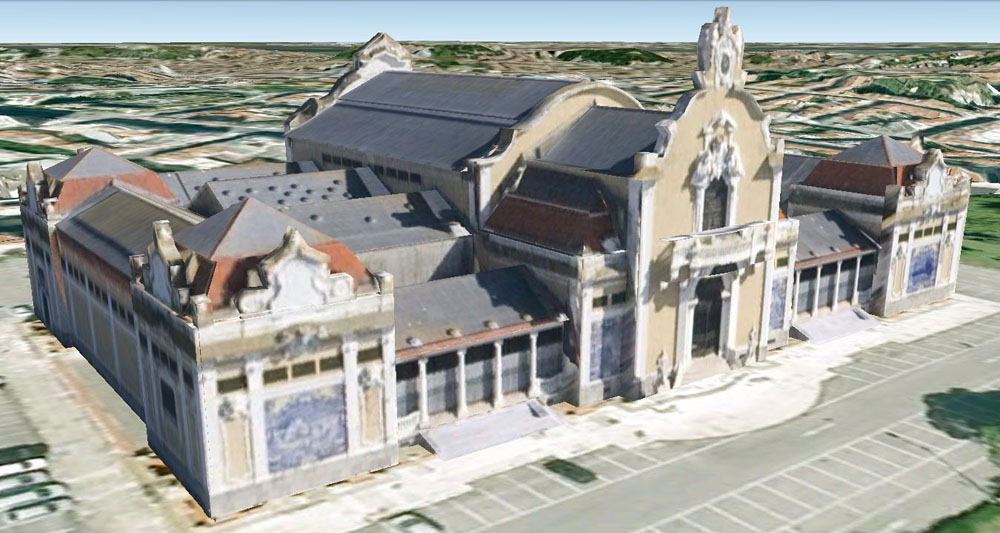
Peter Sih a.k.a. PeterX

Pavilhão Carlos Lopes | Lisbon, Portugal

Lives in: San Jose, CA | Primarily modeling: Everywhere!

"Modeling with Building Maker you get almost instant gratification. I learn a lot by modeling places I don't know as well as places I know well. Modeling for Google Earth ties together my lifelong fascination with geography, architecture, travel, photography, and computers."


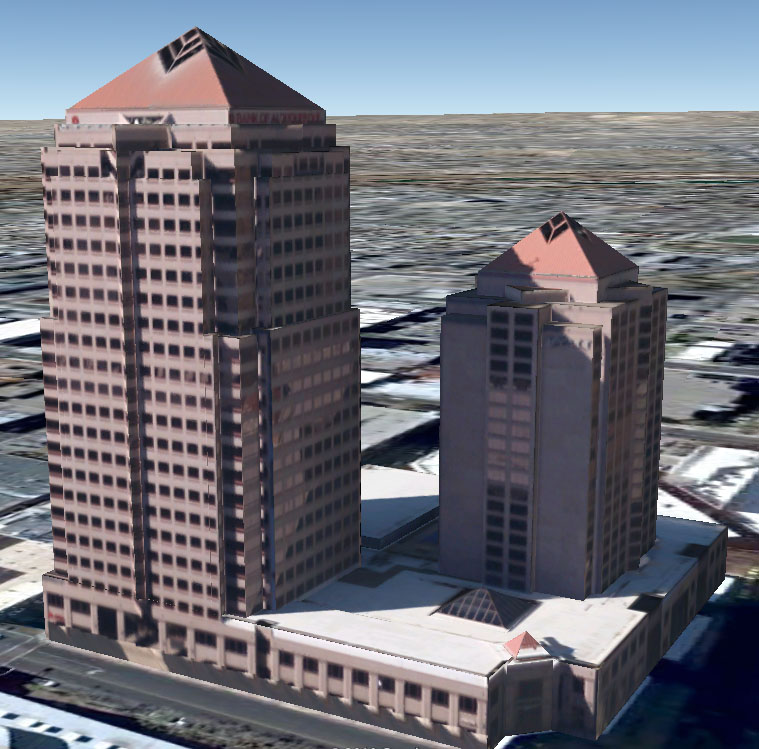
Grant Firl a.k.a. Grant F

Albuquerque Plaza | Albuquerque, New Mexico

Lives in: Fort Collins, CO | Primarily modeling: Albuquerque, NM

“I choose to model with Building Maker for many reasons. Principally, I think that the 3D buildings layer is a very worthwhile tool and I view it as both a privilege and a kind of duty to help fill in content. Secondly, it is both fun and rewarding to create models of physical buildings, especially given the opportunity to share them to Google's users for their use and enjoyment. Thirdly, the 3D buildings layer provides a unique way to preserve and share the hard work and inspiration of actual builders and architects.”


Tim Shoemaker a.k.a. Timshuwy

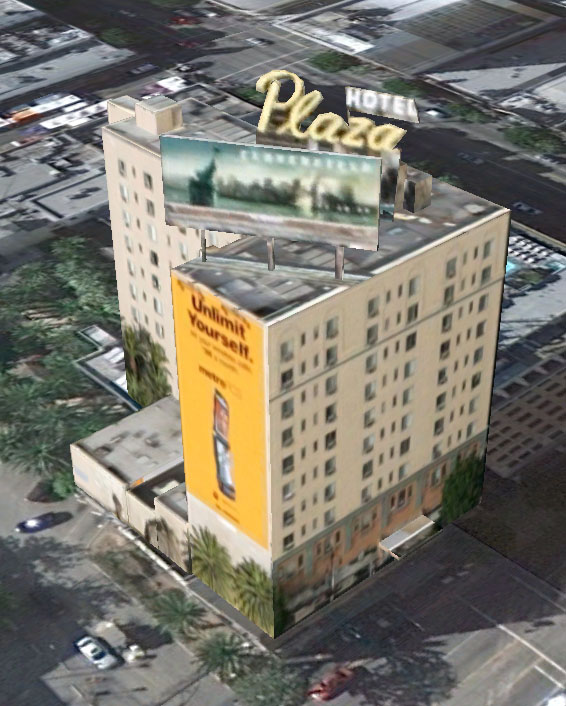
Building in Los Angeles, California

Lives in: San Clemente, CA | Primarily modeling: Riverside, CA

“I have only been doing modeling for a couple of months, but have enjoyed spending some spare time filling in the blanks in the 3D world. I have been a Google Earth user for quite some time, and use it for tracking all the places that I have traveled for my work.”


Thank you all for making this such a fun first year for Building Maker!

Tuesday, September 14, 2010

Case Study: Popular Woodworking Magazine

Take your time reading this piece from Robert W. Lang. He's not only the executive editor at Popular Woodworking Magazine – he's also an accomplished SketchUp modeler who's just released an e-book on DVD. His Woodworker's Guide to Google SketchUp includes no fewer than 49 videos in-line with the text; that's hands-down the best way to learn, in my opinion.


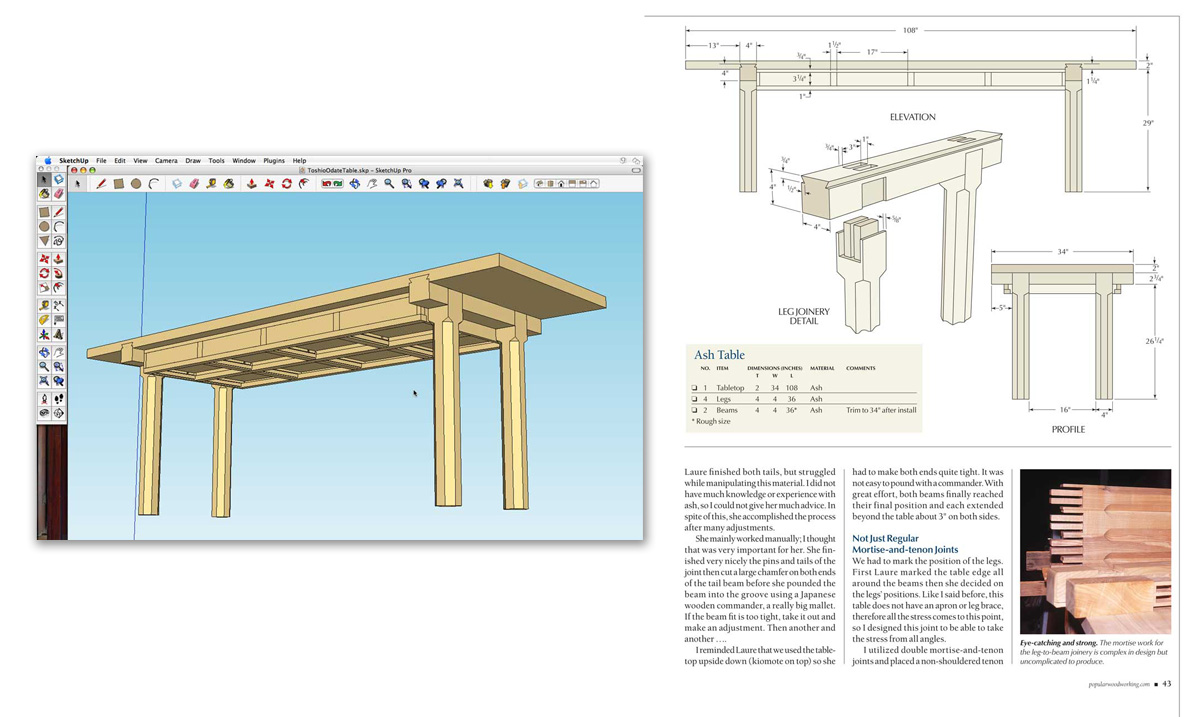
Popular Woodworking Magazine was previously featured in this blog for our 3D Warehouse collection of woodworking models. The collection is closing in on 200 models of projects that were featured in articles in the magazine. This has been a great way for us to connect and share with our readers, but the story of how this collection came to be, and how we use SketchUp is also noteworthy. We started using SketchUp as a tool for planning before we realized its potential as an illustration tool.


High-quality technical illustrations are an important part of our publication. Our readers are mostly hobbyist woodworkers and we need to communicate to them detailed information so they can build the projects that appear in articles in Popular Woodworking Magazine. Each project article includes detailed construction drawings that begin as SketchUp models. We work with a limited amount of space and on tight deadlines so we face some challenges to produce usable, accurate drawings in a short period of time.


Before we switched to SketchUp, this segment was a major headache for our editorial staff. We used the services of an outside illustrator, and needed to provide detailed information to him well in advance of our deadlines. If the illustrator didn’t understand the construction details, if changes were made during building a project, or if errors were found at the last minute we became bogged down in communicating and correcting these issues. The simplest change could involve several phone calls or e-mails and take a lot of time in the face of a rigid deadline. Then we discovered SketchUp.


We began using SketchUp to plan our work. It was faster, more accurate and more flexible than the CAD systems some of us had been using. The editors on our staff who were not experienced in CAD quickly caught on and were soon producing accurate models instead of sketches on paper. The ability to “build” a piece of furniture on the computer before heading to the shop made our limited shop time more productive and greatly reduced planning errors. We had a common well of information to use as a basis for our technical illustrations.


We also used Scenes in SketchUp to visualize how the finished illustrations should best appear in print. The right point of view can make or break an illustration, and this was one of the hardest things to communicate to our outside illustrator. With SketchUp we could show the angle we wanted and make our own exploded views. Our art director began using the SketchUp model to plan photo shoots for projects that hadn’t been constructed. It’s a lot easier to move around a model than it is to move actual furniture and lights in the studio.


It became clear that we were on the right track, and that we were close to being able to do our illustrations ourselves. I began to experiment with exporting .dwg files from SketchUp Pro, then adjusting things like line weights, fills and text in Adobe Illustrator. In a brief period of time, I developed a system to make this a simple process. We have since developed standards and templates to use in Adobe Illustrator, and all of our staff is now either doing, or learning how to do their own finished illustrations for publication.


We are a small staff, and our editors wear many hats. We design and build our own projects, do our own photography, and edit and produce drawings for projects from outside authors. SketchUp has enabled us to reduce the amount of time we spend planning projects and producing illustrations, while improving the quality of our illustrations. In addition to the time saved initially, changes can be made and problems can be solved in minutes instead of days. Thanks to SketchUp, we have more time to build and write, and far less stress in our production process. With the addition of solid modeling tools in SketchUp Pro 8, things will only get better.

Posted by Aidan Chopra, SketchUp Evangelist

Wednesday, September 1, 2010

Geo-modeling features in SketchUp 8

It's a small world, but I wouldn't want to paint it. – Steven Wright

If modeling the planet is like painting a house, Google provides a lot of different brushes. Internally, we have these big paint sprayers that we’re using in major cities to cover huge swaths of suburbia in a single stroke, but when it comes to the fine work, Google SketchUp and Google Building Maker are the hand brushes. They allow people all over the world to fill in the gaps, perfect signature buildings, and smooth over the mistakes left by the big rollers. With SketchUp 8, the geo-modeling brush set is better connected with Google’s massive geo-data paint bucket than ever before.

Jumpstart your model with Building Maker

SketchUp 8 can open Google Building Maker models downloaded from the 3D Warehouse, and every image used for texturing is automatically created as a Match Photo scene, saving you huge amounts of time gathering measurements and photographs of a building.


Open your Building Maker model and the new Outer Shell tool can merge its primitives into a single SketchUp mesh. From there, the revamped Scenes dialog box and Igloo Mode makes organizing and navigating between your scene tabs a snap. There are even new Style settings for the opacity of Match Photo overlays and backgrounds. A new Back Edges line style provides traditional hidden-line visualization of edges behind or inside your building, and the Push/Pull tool now has a preselect mode that allows you to move faces that you can’t see from a given scene.


Get highest quality, full-color terrain and imagery

The new Add Location feature allows you to import terrain directly into SketchUp without having to fire up Google Earth. Your imported terrain is higher resolution than it was in SketchUp 7, more accurate, and now in full color. Also, Photo Textures from Street View in Google Maps are now part of the revamped Google toolbar.


Model in context

If you’re designing a new building, you can use Building Maker right inside SketchUp 8 to create context models around your site. Simply Add Location to geo-locate your model, and then click the Add Building button. If your site lies in one of the (ever growing) list of Building Maker cities, you’ll be able to create the surrounding buildings in a fraction of the time it would take to model them from scratch. Also, you can find nearby buildings that others have modeled by selecting “Nearby Models” from the Navigation drop-down menu in the Components Browser.


Posted by Scott Lininger, SketchUp Software Developer

Announcing Google SketchUp 8

Today is an exciting day around the SketchUp World Headquarters out here in Boulder, Colorado. We’ve just kicked off our third bi-annual “3D Basecamp” to a crowd of SketchUp-savvy folks converging on The Dairy Center from all around the world. I’m looking forward to some great conversations about SketchUp and 3D modeling in general over the next few days. But that’s not our only news today...

We’ve also finished work on SketchUp 8, the next major release of our favorite 3D modeling tool. We’ve been heads down and working hard for most of the last year, and I’m happy to be able to share with you the fruits of our labor.


Google SketchUp 8 includes a batch of exciting new features. We’ve made it easier to build site context models for your projects using our ever-growing collection of geo-data. We’ve added a new collection of “Solid” tools for doing common additive/subtractive modeling operations and we’ve packed out LayOut with some new features that make it easier to document your models professionally.


Ordinarily, those of you who use SketchUp in a language other than English have to wait a few weeks for a version in your language. But not this time—today, SketchUp 8 is available for download in English, French, Spanish, Italian or German language versions. (We weren’t able to get all our translations done in time for release today, but keep an eye on this blog for news about SketchUp 8 in more languages soon)

As always, SketchUp Pro 8 is available for $495 from our web store. Upgrades from any previous version of SketchUp Pro can be had from for only $95. And, of course, we’ve still got a version of SketchUp available for free. Head on over to our main website for all the details.

You can be sure we’ll be talking about this release a lot over the next few days at 3D Basecamp, but I want to make sure that those of you who weren’t able to join us in Boulder have a chance to let us know what you think, too. I’ve posted a new Google SketchUp Questions and Ideas series. I’m listening, and I’ll respond to as many of the top posts there as I can.

Tuesday, August 24, 2010

Street View Imagery Available in Building Maker

If you’ve ever modeled a building in Google Building Maker, you may have found yourself wanting to use crisper, more detailed photos in addition to the aerial oblique imagery. Or, you may have had problems with poor textures caused by other buildings blocking the view of your building. In response to these issues we recently added the ability to add your own photos to Building Maker, but now you can also use imagery directly from Street View on Google Maps!

Start modeling your building using the aerial imagery. After you have constrained a block in at least two aerial images, you will be able to “Add Street View Images” from a drop down menu on the left-hand side. Capture a few images from Street View and continue modeling as normal. The following video illustrates an example of using this new feature:


We have also added 6 new cities to Building Maker (all, with the exception of Vienna, have Street View imagery!):

Edinburgh, United Kingdom
Florence, Italy
Vienna, Austria
Pittsburgh, PA, United States
Santa Cruz, CA, United States
Riverside, CA, United States

Try modeling with Street View imagery in Google Building Maker now!

Thursday, August 5, 2010

Stay informed about your models

Great news! In response to customer feedback, the Google 3D Warehouse now sends model updates via email, allowing you to stay informed about the status of your models as they’re being evaluated.

Now, when your model is published to Google Earth you’ll receive a congratulatory message. Likewise, we’ll also let you know if your model wasn’t accepted, or if it was replaced by another model. With these email notifications, you don’t have to check your models in the 3D Warehouse to see their status. When we have an update, we’ll send you an email.

As always, we respect your right to control how much email you get from Google. If you’d like to update your current email notification settings, please visit your preferences.

Wednesday, July 28, 2010

Fine-tuning your shadows

You can control which entities in your models cast shadows; you can also determine which ones are able to receive them. Case in point:

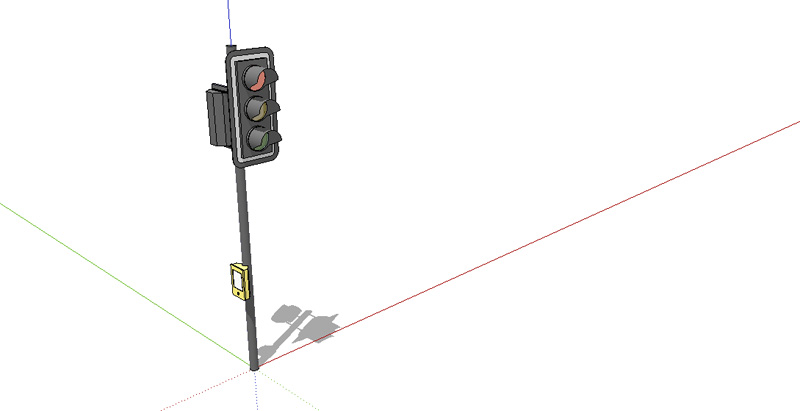
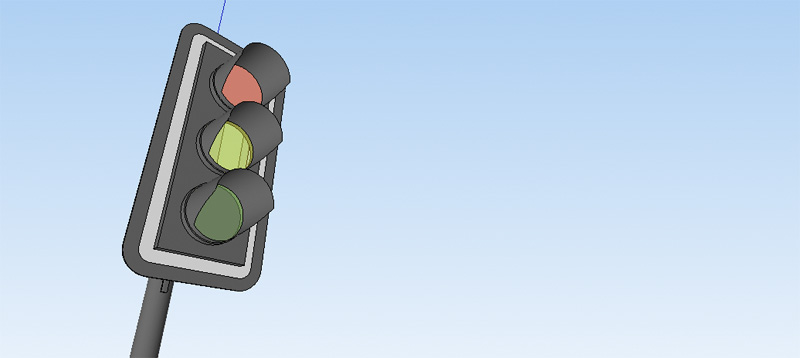
Recently, I needed an image of a traffic light that appeared to be lit up. I searched the 3D Warehouse and found a nice one uploaded by Manager. It appears to have been modeled by Andy Glucker and made available for free on FormFonts.com.


I used Styles to make a blue sky, set my Field of View to something wider than the default, dragged my modeling window into a long, wide rectangle, and aimed my camera up:


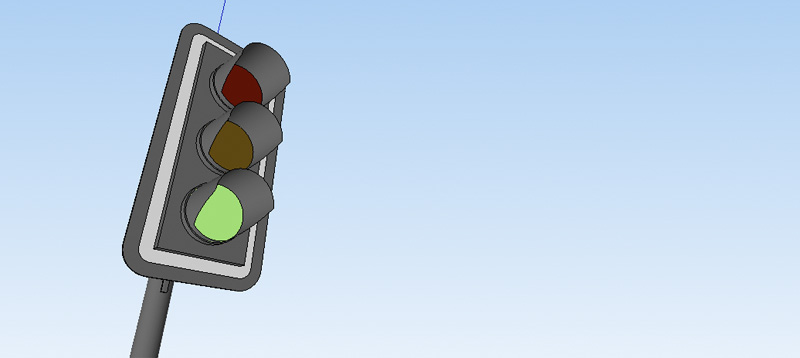
The green light should be lit up, so I colored it bright, light green. The red and amber lights got painted darker to increase the contrast between them and the green one:


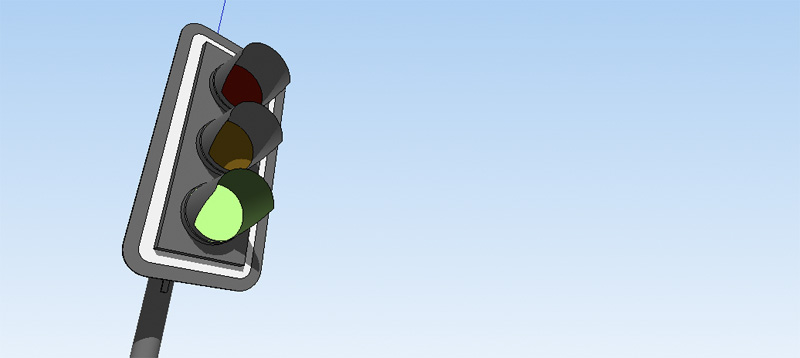
To give it some definition and make it "pop" a little, I switched on shadows. There's a problem, though: lit-up faces shouldn't be able to receive shadows.

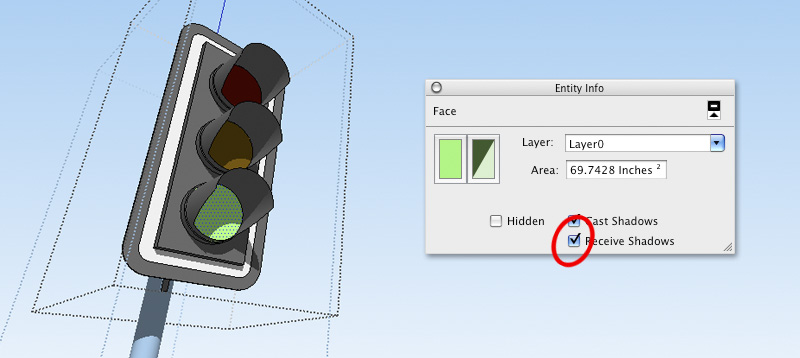
Uncheck Receive Shadows to tell faces not to let shadows fall on them.

No worries; I selected the green light, opened and expanded the Entity Info dialog box, and unchecked "Receive Shadows":


I also made sure the underside of the "eyebrow" over the lamp didn't receive a shadow. To make it look like it might be receiving greenish light, I painted it a green-tinted dark gray.

It's not a photo-rendering, but it works.

Posted by Aidan Chopra, SketchUp Evangelist

Monday, July 19, 2010

Seville in 3D with Google Earth

We're pleased to announce that you can now explore the city of Seville in 3D with Google Earth. Take a virtual tour of the most symbolic buildings of the Spanish city, that range from the Roman Empire, through the Calatrava bridges to the best examples of contemporary architecture.


This is a unique opportunity to visit the Andalusian capital avoiding the summer heat. We encourage you to walk to the Torre del Oro, Plaza de España or La Real Maestranza - just using your computer mouse.

Thursday, July 8, 2010

Berlin and Stuttgart in 3D

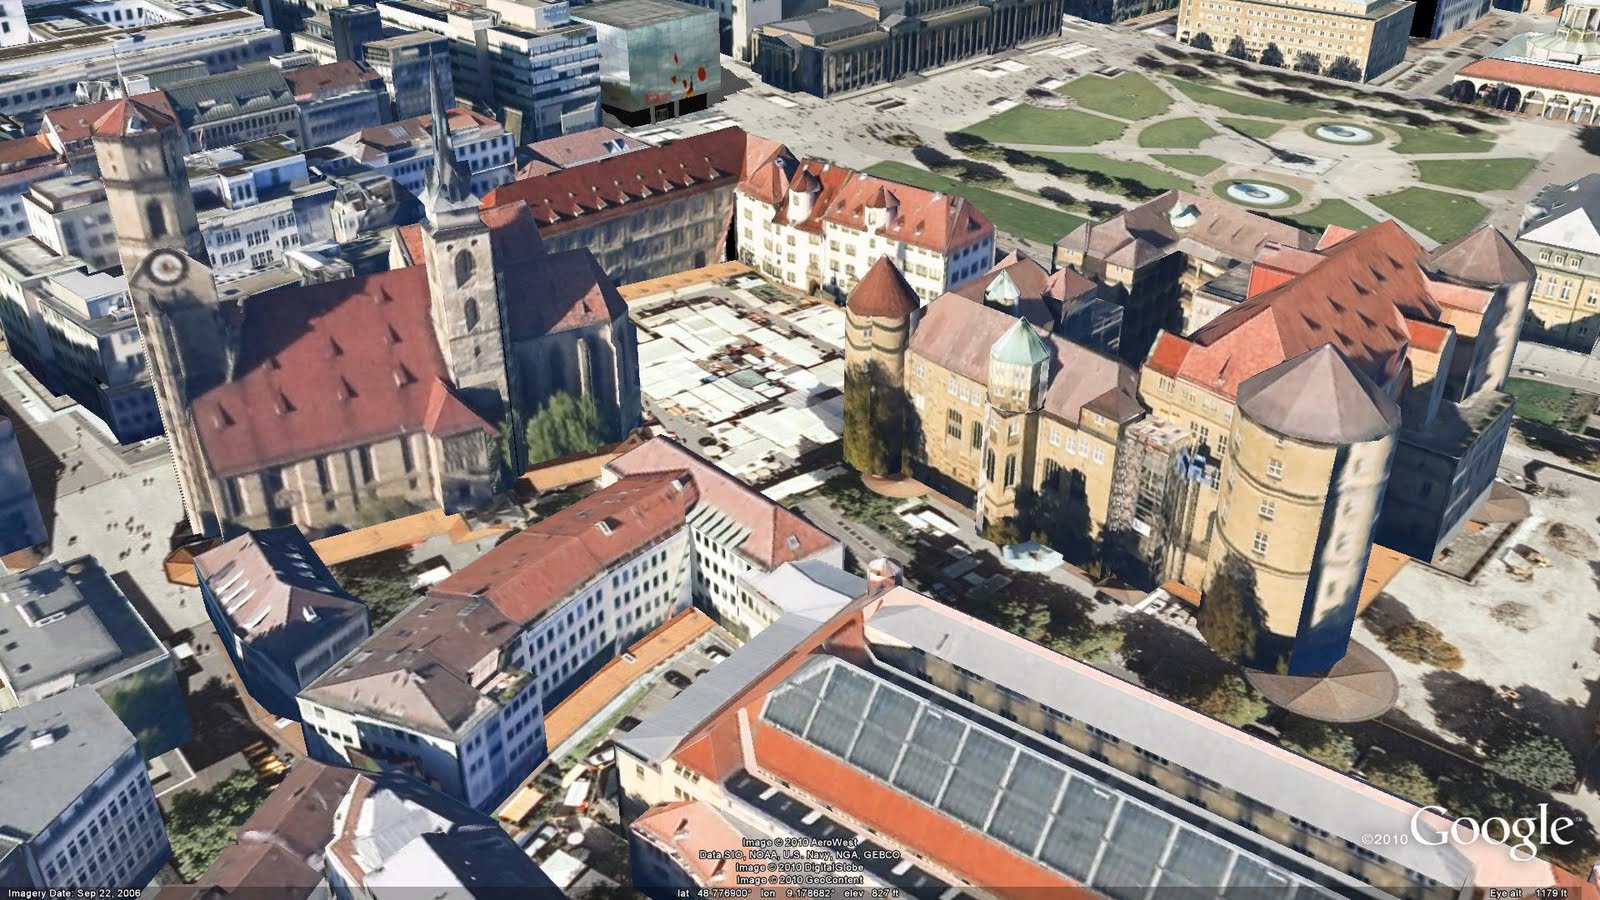
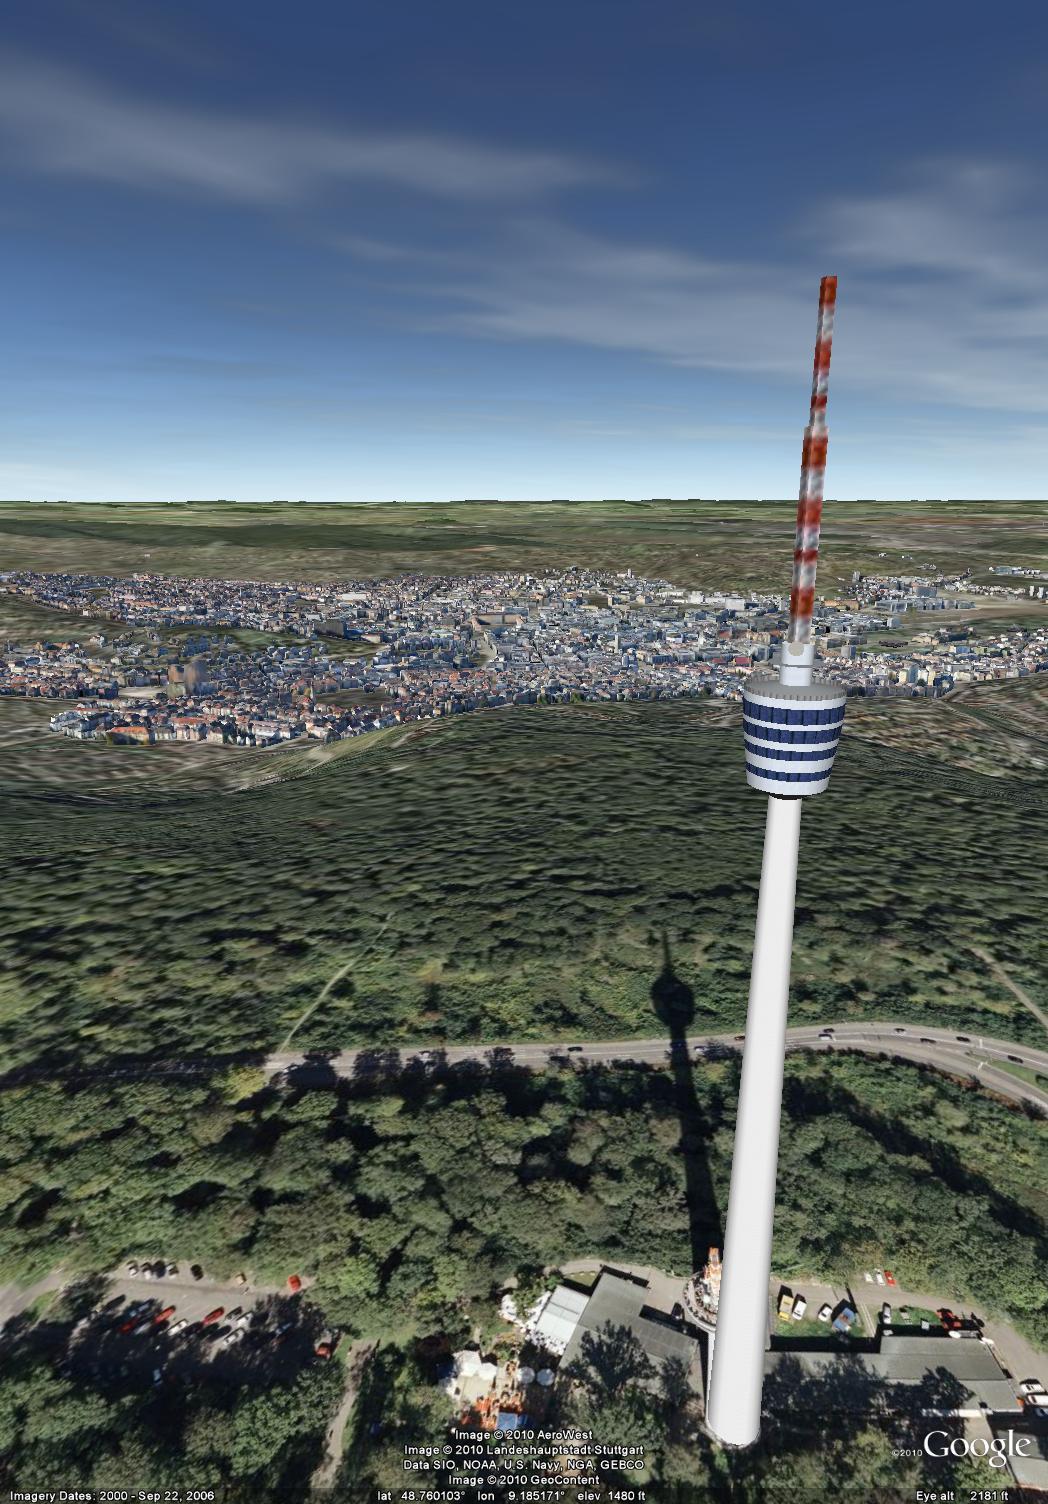
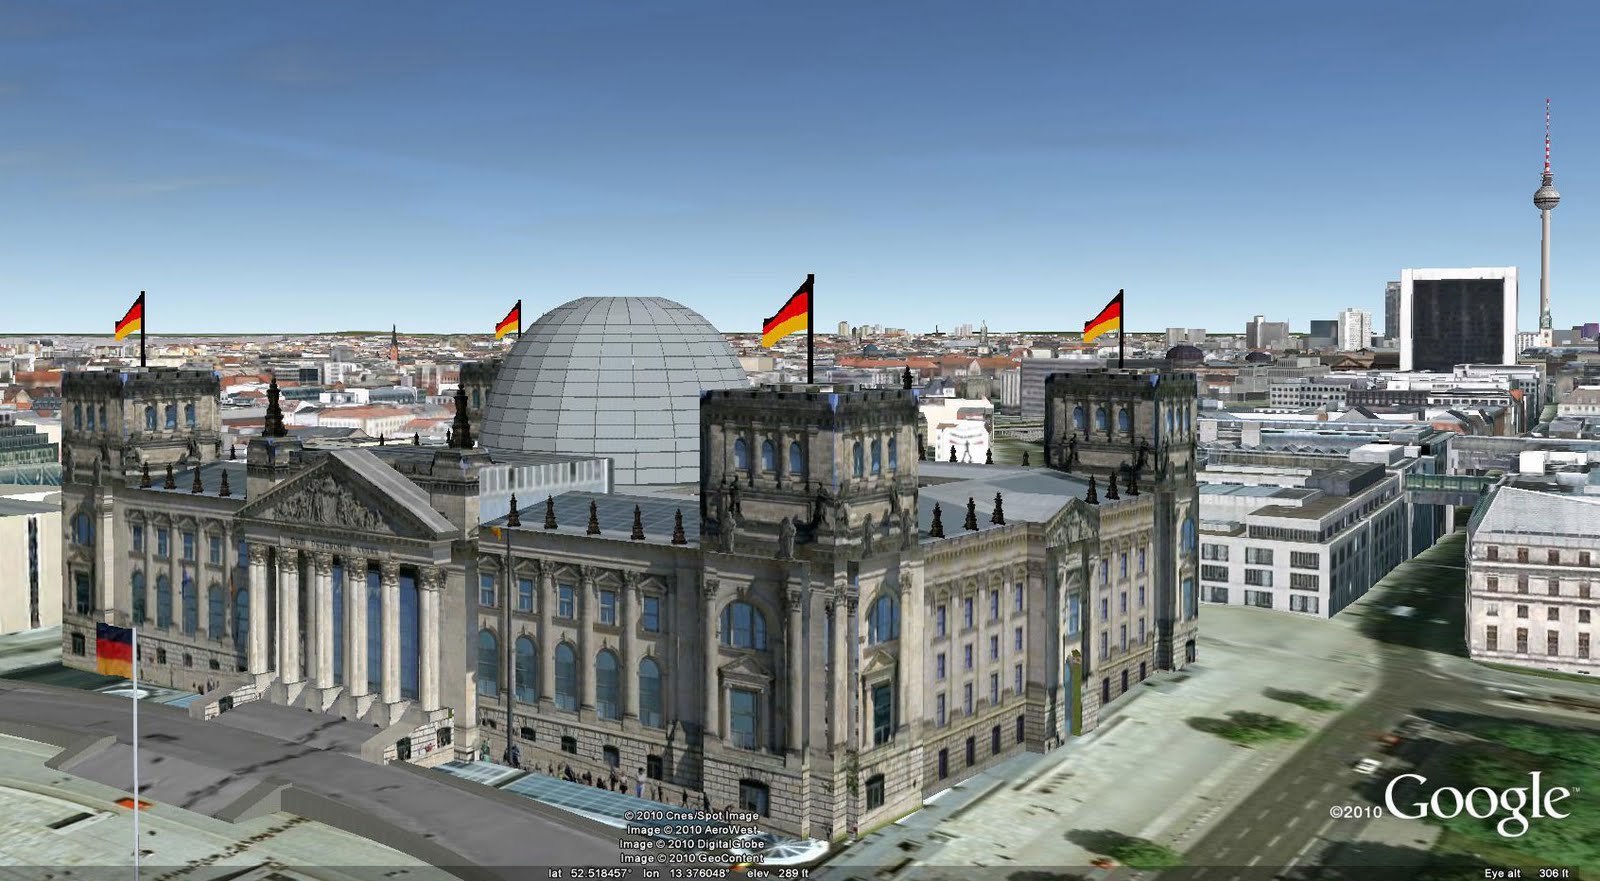
We released two new cities in Google Earth’s 3D Buildings layer today - Berlin and Stuttgart. Both of these proud German cities contain numerous architectural masterpieces, making them ideal destinations for virtual tourism.


Having resided in Stuttgart, I was particularly excited to see many of the places that I’ve frequented appear in Google Earth. The first place I visited on my own virtual tour was Schillerplatz square a site where numerous holiday festivals and markets are held. Walking distance from there is the Schlossgarten, the large, park-like area that includes the old castle, the National Theatre, Stuttgart’s main train station, the opera, and planetarium.


Geo-modelers, peterX and tbr, have modeled many of the places of interest in Stuttgart, all of which are contained in this collection.

Before leaving Stuttgart make sure you visit the corporate headquarters of the famous Mercedes brand, as well as the massive television tower that can be seen from anywhere in the city.


Being the capital of this once divided country, Berlin boasts a plethora of famous government and cultural buildings. The Brandenburg Gate at Pariser Platz, the former location of the infamous “Berlin Wall” may well be one of the most visited places in Google Earth. If you fly there, you can explore the Tiergarten (Soviet war museum), Reichstag, Kongresshalle, and famous monuments such as the Berliner Siegessaule - all within a short walking distance.


Related Posts Plugin for WordPress, Blogger...