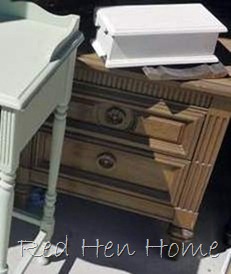
I picked up a pair of nightstands several weeks ago at Savers (kind of like a “Goodwill”). They were lovely, solid wood…just boring. But they sat…and sat…and sat…in my garage because they wouldn’t speak to me and tell me what they wanted to be! Ornery buggers.
Be warned…this is not a technique for the faint of heart. There is nothing difficult about it, but it’s fiddly and time-consuming…and STICKY!!
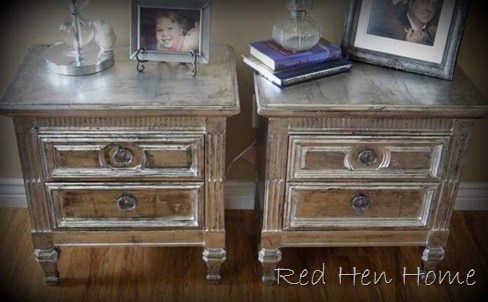
Here’s a peek at my finished product: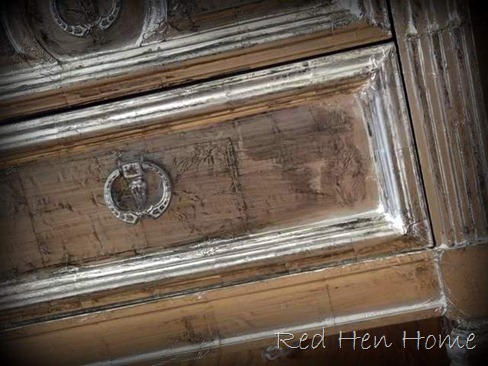
Here’s a brief description of the steps I took (again, many thanks the The Ivy Cottage):
1. Cut many, many, many squares of aluminum foil! I used regular old scissors. Amanda suggests tearing them with a straight edge, but I didn’t have a lot of luck with that technique. She also suggests using heavy-duty foil, but I missed that part! I would change that if I could.
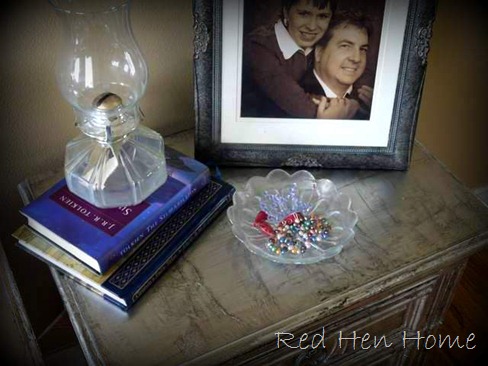
2. Use a foam brush to spread a thin layer of wallpaper paste on your furniture. Apply a piece of aluminum foil, and smooth it down as best you can. On flat surfaces, I used a rubber spatula, but almost every where else, I had to rely on my fingers to get in all the grooves and details. You will get wallpaper paste on the surface of the foil (and possibly everywhere else). (You might also find funny red splotches as you smooth your foil on, and you'll wonder if the kids did a lousy job wiping the table--again--and you have last night's pizza sauce mixed in with the wallpaper paste now. But just before you yell at them, you might realize you sliced your finger open somewhere along the way, and you're bleeding into the wallpaper paste. Can't blame the kids for that one!) Go with it; it will be just fine! Make sure you overlap the edges of the foil.
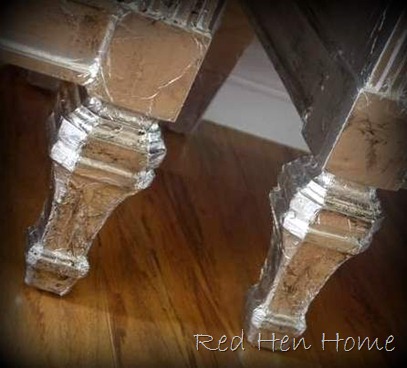
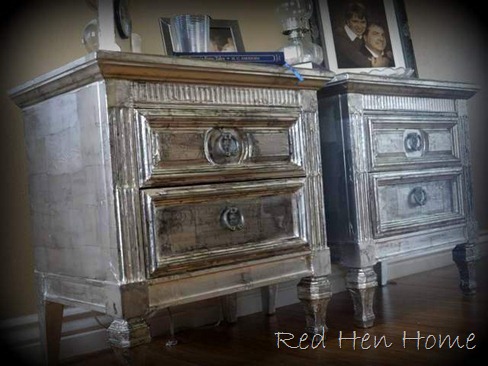
3. When everything is completely dry, use a damp rag to wash away the glue residue. The foil is remarkably resilient, and it stood up to a little scrubbing beautifully.
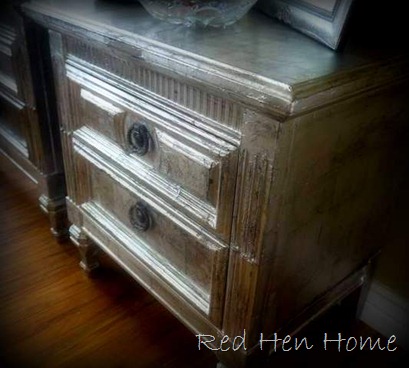
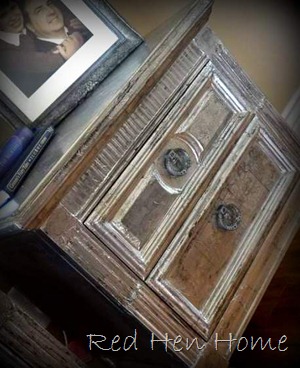
4. Apply a drop of black acrylic paint to the foil, and rub it in and around with a paper towel. If you get too much, dampen it and you can wipe it right off. This is really like glazing a piece of furniture. The paint darkens the foil and gets in the wrinkles, giving it some “age” and character. I really liked the change this made in the overall look of the piece..
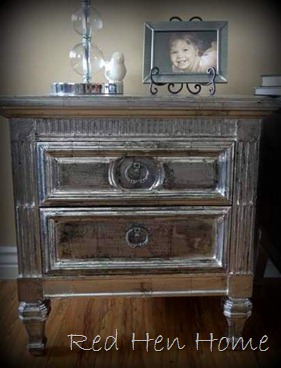
Note: I realized…too late…that I hadn’t been very careful in placing my foil shiny side up all the time! I decided that that added “character” to the piece as well, and I left it! Then I had to make sure to do the same thing on the second nightstand.
5. Protect your masterpiece with two coats of Minwax Polycrylic. I chose to brush it on, rather than spraying it on, because brushing gives a thicker coat! Also because the electricity was out right then!
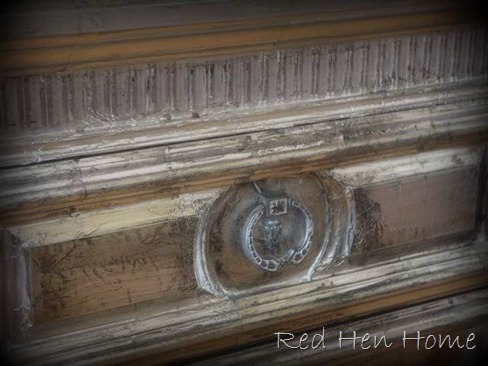
6. I chose to keep the original pulls. I sprayed them silver (Rustoleum Aluminum, to be exact), and then applied black Rub-n-Buff over the surfaces. I think it matched remarkably well.
10/2/12: You can see another foil project here! *********************** This project has been featured at Beyond the Picket Fence, Craft Gossip, and
Thank you!

(This is the best I can do for a “before” picture. I swear I took one, but I can’t locate it…sorry!)
Then, the magical day happened…I read a tutorial on The Ivy Cottage for a faux-silver-leaf wall, of all things! What’s the faux part you ask? Amanda uses tin foil and wallpaper paste! She said she had successfully used the technique on furniture, and that was all I needed to know…and off I went to Home Depot!Be warned…this is not a technique for the faint of heart. There is nothing difficult about it, but it’s fiddly and time-consuming…and STICKY!!
Here’s a peek at my finished product:

Here’s a brief description of the steps I took (again, many thanks the The Ivy Cottage):
1. Cut many, many, many squares of aluminum foil! I used regular old scissors. Amanda suggests tearing them with a straight edge, but I didn’t have a lot of luck with that technique. She also suggests using heavy-duty foil, but I missed that part! I would change that if I could.

2. Use a foam brush to spread a thin layer of wallpaper paste on your furniture. Apply a piece of aluminum foil, and smooth it down as best you can. On flat surfaces, I used a rubber spatula, but almost every where else, I had to rely on my fingers to get in all the grooves and details. You will get wallpaper paste on the surface of the foil (and possibly everywhere else). (You might also find funny red splotches as you smooth your foil on, and you'll wonder if the kids did a lousy job wiping the table--again--and you have last night's pizza sauce mixed in with the wallpaper paste now. But just before you yell at them, you might realize you sliced your finger open somewhere along the way, and you're bleeding into the wallpaper paste. Can't blame the kids for that one!) Go with it; it will be just fine! Make sure you overlap the edges of the foil.

(I would like to note that wrapping the legs was a royal pain!)

3. When everything is completely dry, use a damp rag to wash away the glue residue. The foil is remarkably resilient, and it stood up to a little scrubbing beautifully.

4. Apply a drop of black acrylic paint to the foil, and rub it in and around with a paper towel. If you get too much, dampen it and you can wipe it right off. This is really like glazing a piece of furniture. The paint darkens the foil and gets in the wrinkles, giving it some “age” and character. I really liked the change this made in the overall look of the piece..

Note: I realized…too late…that I hadn’t been very careful in placing my foil shiny side up all the time! I decided that that added “character” to the piece as well, and I left it! Then I had to make sure to do the same thing on the second nightstand.
5. Protect your masterpiece with two coats of Minwax Polycrylic. I chose to brush it on, rather than spraying it on, because brushing gives a thicker coat! Also because the electricity was out right then!

6. I chose to keep the original pulls. I sprayed them silver (Rustoleum Aluminum, to be exact), and then applied black Rub-n-Buff over the surfaces. I think it matched remarkably well.

So what do you think?
Is this a technique you’ve ever tried before?
Or would you consider it now?

Thank you!
Linking up to these great parties here, and be sure to check out Amanda's inspirational blog:  .
.


-1.jpg)