Everything is better with fur on it.
I submit for your consideration the following well-known corporate logo (modeled in SketchUp):
Now with fur added:
I rest my case.
Tak2hata released Fur Maker into the world less than a month ago, but it’s already made quite a splash with the SketchUp faithful; people are having tons of fun with it. Quite simply, it allows you to “grow” fur (or fur-like things like grass) on your model faces. You make a selection, activate Fur Maker, adjust the settings, and click Make Fur. After a few seconds, your model looks like it just drank a testosterone milkshake. But in a good way.
First, the requisite disclaimers and instructional bullets:
- Fur Maker is available for download for free from this thread on SketchUcation. If you think it’s as terrific as I do, leave tak2hata a note (on the thread) to thank him.
- To install it, download the fur_en.rb and fur_lang_en.txt files from the above link and drop them in your plugins folder. If you’d prefer another language, download the relevant .txt file instead (as of today, kind volunteers have provided translations for Japanese, Spanish, French and Persian). Take a look at our Ruby Scripts page for more info if you need it.
- Fur Maker is a young script, meaning it’s only been around for a very short time. As such, there’s always a chance it’ll exhibit erratic behavior. Save early and often.
- I am by no means a Fur Maker expert. I know what some of its controls do, but others baffle me. I’ve just been experimenting to see what I get; the script is quick enough for plenty of trial-and-error.
How it works
After it’s installed, choose Plugins > fur_en > fur_en(WebDialog) from SketchUp’s menu bar to bring up the Fur Maker control panel. Like I said, I don’t know exactly what everything does, but here’s some of what I’ve figured out so far:
Type lets you pick a ready-made shape to use as a single, repeated element. “Linear” seems to work well for hair and grass. “Arch” and “Leaf” are appropriate for other kinds of vegetation. “Rectangular” and “Box” might be useful if you’re modeling trees for the ice planet Xderaflunon.
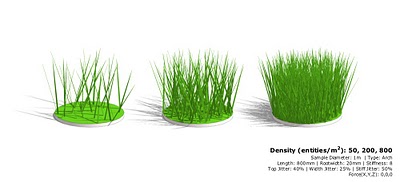
Density(Num/m2) and Max Number(/Face) control the number of entities the script creates.
Length and Rootwidth control the size of the entities that are drawn. To be clear, Rootwidth lets you specify the width at the widest part. Use a small number (relative to Length) for grass; pick a bigger number for broader leaves.
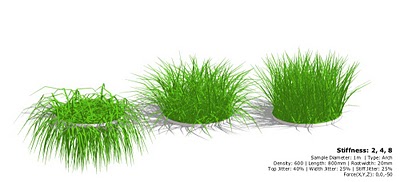
Stiffness seems to be exactly what it implies; entities’ resistance to bending when a Force (later on in the dialog box) is applied. I’m not sure what the units of measure are, but a Stiffness of 1 is very droopy, and 100 is quite a bit less so. The default value of 8 seems to yield good results most of the time.
 Control the droopiness of your entities by adjusting Stiffness and applying a Force. Did I just write that?
Top Jitter, Width Jitter and Stiff Jitter are controls that let you randomize the size, orientation and stiffness of entities. Setting them to 0% makes everything identical. Setting them to 100% makes it look like your model just got out of bed.
I currently have no idea what the settings for Divide and Valid Distance do. Could someone please enlighten me via this post’s comment thread?
Direction (X, Y and Z) appear to influence the general orientation of entities in your ensuing “fur”. I’m not crystal clear about this, but setting a very high number (like 3000m) for any one of these fields seems to have a profound effect.
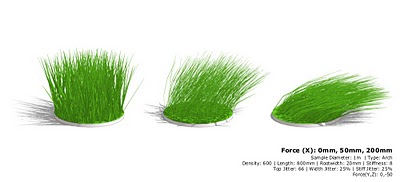
Force (X, Y and Z) let you simulate the effect of things like gravity and wind. Too cool, really. Used in combination with Stiffness (see above), you can get some really nice effects.
 Force lets you bend your entities in a given direction. Make sure to use in conjunction with Stiffness.
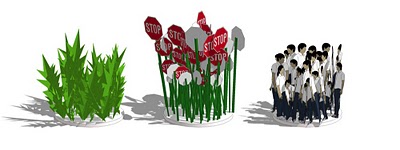
Component lets you specify what to use as an individual entity. Choosing “no” draws whatever you’ve selected in Type (above) as simple, ungrouped geometry. Choose “yes” draws components; this takes longer. You can also pick any component in your model to use as an entity.
I haven’t played with the settings for presets just yet. I’m having too much fun putting fur on everything I’ve modeled in the last three years.
Thank you and congratulations to tak2hata -- you’ve made a lot of SketchUppers very, very happy this month.
Posted by Aidan Chopra, SketchUp Evangelist


0 comments
Post a Comment